How I created a mobile App to help you find where to Eat Out to Help Out
Last week, Associate Gerald Benischke posted about his Eat Out To Help Out discount dining finder – a map tool he created to help the public easily find local restaurants participating in the scheme.
I loved how each of the problems he encountered were solved using simple scripts and old fashioned unix utilities that reduced solutions to the minimum needed.
The creation of this tool led to internal discussions between myself and Gerald about how to turn this good idea into an App, and how best to go about promoting it. I suggested he could try some different routes to get an App done following the usual quick wins: 1) Wrap it all in a webview and be done. 2) Re-do with native components but use one of the Web-based development frameworks like ReactNative or maybe Cordova/PhoneGap, or 3) Publish some APIs until a willing participant comes along to take on the build of a native App.
That willing participant turned out to be me! What I really wanted Gerald to do was build this as a fully native iOS App using native maps and UI. I thought this would give it the best app experience and make it a worthwhile addition to the App Store, not just a tool to help market a website, (personally I feel cheated when that happens because I think we all go to the App Store for Apps. If we wanted a website, well that’s what browsers are for).
So that’s what we did and to follow, (in the house style of Gerald’s first post), is how we did it. I think it makes for an interesting contrast to the different concerns that arise between native mobile development and web development.
Starter
We started with a list of participating restaurants, and their latitude and longitudes, so that we could place them on a native map. Initially, I expected to re-implement the partition, lookup approach that had been used for the site. I could have lifted the Javascript code for this and then used iOS’s native JavaScriptCore engine to run the Javascript within the App (without a browser). Gerald already had found a way to make my life much easier. After checking out Getting Started with MapKit, and spotting the native support for GeoJSON formatted files, he found another tool, csv2geojson. A quick NPM install later, he had a tidy 1Mb file in GeoJSON format containing all 55,000 restaurants.
This meant we could download all the data we would need very quickly for devices in a format ready to parse and annotate a map with. There’s a postcode lookup on the site which makes for the central part of the UI. In the spirit of “You Aren’t Going To Need It” (YAGNI), and deferring everything until we really needed it, I decided to leave this for now. Instead I focused on just getting the annotations on the map, and checking how well or bad this would perform with 55,000 items.
Soup
The site uses LeafletJS for maps. On iOS we decided to simply opt for the native Apple Maps via MapKit, which came out of the box and behaves consistently with other Apps, gives the best user experience, performance and developer APIs (there’s also a little known web version available which is on par with the native version MapKitJS).
We then discovered that getting a map on screen is easy, but setting the map position up correctly takes a little bit of learning around the APIs – finding the right coordinates to centre the map to the UK, for example, (turns out the middle of the UK is somewhere in Morecambe Bay). Figuring this out took some trial and error, not being familiar with the maths behind it all.
extension CLLocationCoordinate2D {

    // Somewhere in Morecambe Bay

    static let UK = CLLocationCoordinate2D(latitude: 54.093409, longitude: -2.89479)

}

extension MKCoordinateSpan {

    static let HIGH = MKCoordinateSpan(latitudeDelta: 14.83, longitudeDelta: 12.22)

    static let MIDDLE = MKCoordinateSpan(latitudeDelta: 0.025, longitudeDelta: 0.025)

    static let LOW = MKCoordinateSpan(latitudeDelta: 0.005, longitudeDelta: 0.005)

}

extension MKCoordinateRegion {

    static let UK = MKCoordinateRegion(center: CLLocationCoordinate2D.UK, span: MKCoordinateSpan.HIGH)

}

extension CLLocationDistance {

    static let UKZoomMin = CLLocationDistance(exactly: 0.5 * 1000)!

    static let UKZoomMax = CLLocationDistance(exactly: 2200 * 1000)!

}
We also discovered that as the scheme only applies to the UK, the maps was locked to the UK, meaning it’s not possible to pan away, or when using location, to show somewhere else if you happen to be outside the UK. This caused us a little fun later at App Store review time.
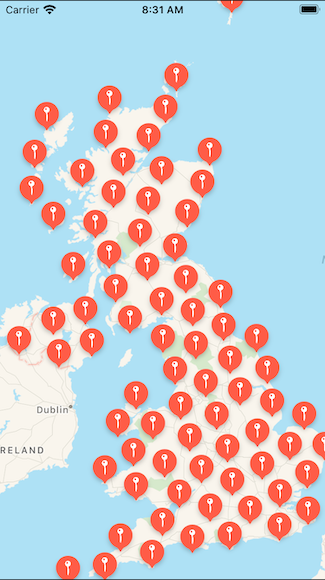
Now we had to ensure that the map had something on it. After some run-of-the-mill implementation of file downloading with NSURLSession, and correctly observing server cache policies to avoid unnecessary bandwidth usage on the GitHub site, we had the GeoJSON file (transported as a gzip file to further save bandwidth). We parsed that into an in-memory store of native Swift objects giving us our 55,000 objects and locations. To see how things performed, I threw the entire lot onto the native map and watched what happened:
It now looks promising, and MapKit does a good job of clustering nearby annotations. But performance was very poor and was resulting in jagged, unresponsive panning and zooming – because of dynamically re-calculating clusters from the 55,000 locations it was being asked to track in real-time.
There are probably all kinds of ways to get smarter about what annotations to plot on the map, resulting in more intelligent clustering. However our lack of time was a bit of a factor, so finding some quick ways to cheat was the “Plat du Jour.” I decided to use the fact that it’s not actually helpful to see every single restaurant on a map when you’re really after those that are nearby.
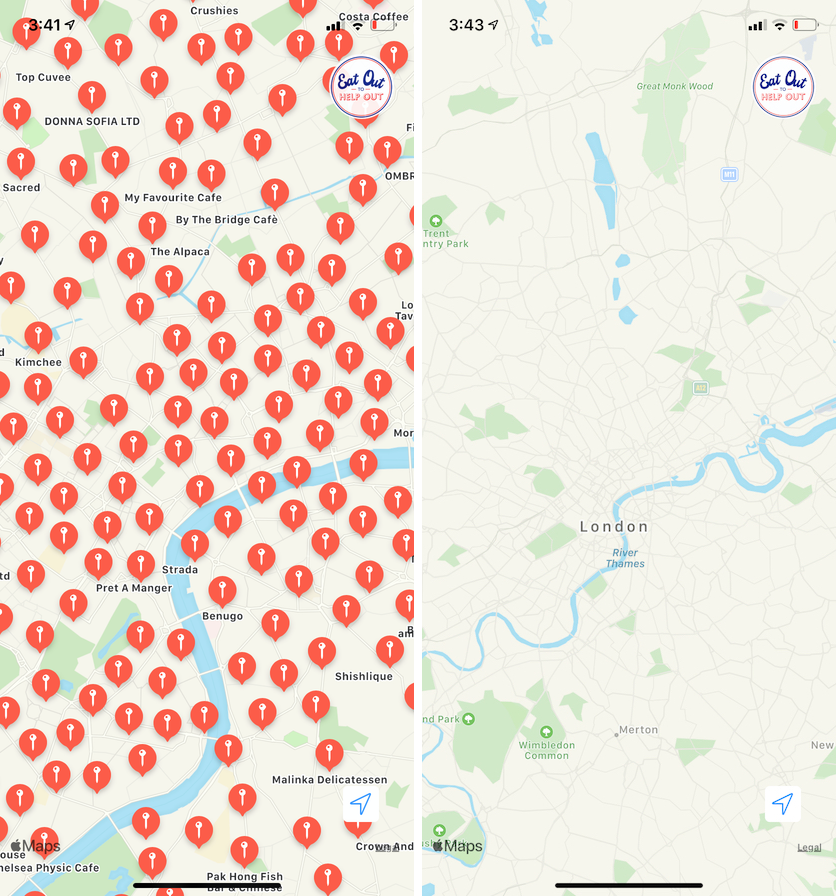
So the quick solution was to begin by limiting annotations so that the user more quickly gets to a street level of detail. Using a quick check of whether a location fitted within the current map’s view, we were able to limit the number of annotations on the map at any one time, although not enough, as the annotations on the periphery seemed less useful. I think Gerald’s approach of using a 5 mile radius from the centre point instead could be used here.
This limited the number of annotations on the map at any one time, which really helped – however it still will begin to grind at the limits of dealing with density of locations in places like central London.
The implementation so far still involved a brute force enumeration of 55,000 records after every pan & zoom of the map which you can see in the code below. Sounds SLOW, but these are finely tuned super-computers so it turned out that our concerns were unwarranted. Computation performance was no problem in this regard, even on a stately iPhone SE. (Rendering demands also scale down naturally due to the decrease in screen size on smaller devices, meaning performance concerns were also unwarranted.)
Filter 55k records…on a PHONE! Ha-ha… Oh wait a minute! ????
let annotations = items.filter {

   return mapViewRect.contains(MKMapPoint(restaurant.coordinate))

}
Optimising this part of the code with a partitioned lookup approach would have been premature and involving the possibly larger performance bottleneck of downloading a large number of much smaller files which would have been very costly in network and battery performance.
On mobile, it’s known to be more power efficient to download few bigger files, than perform many network requests for smaller files. Having all the data on device and in-memory meant calculations could be very fast without incurring network lookups.
Meat
We now had a map where performance was ok. Whilst there was some room for improvement, “time to App Store,” rather than ideal implementations, was the critical priority here, so we left the map as is.
Earlier we had deferred the postcode search to give users a quick way to find locations nearby. With the map in place, it was time again to think about whether this was needed now or not.
Postcode Not Found
It turns out that on a phone with a multitouch interface, it’s faster and more natural to pinch and zoom your way to a place IMO than it is to peck out a postcode on the keyboard.
On the web, you don’t have the luxuries of pinch and zoom, but you do have a big keyboard and mouse at your fingertips, and a postcode look up makes sense. Just one of the considerations where it makes sense for mobile UX and web UX to tailor themselves to the user inputs to hand.
For an App I believe multitouch is by far the most efficient and preferred user input. On the web, the default is to design for keyboard and mouse for the widest cross-platform support..
Even faster than pinching and zooming would be to use your actual location. Perhaps not as natural to enable in a browser, but we tend to consider Apps to have better security and privacy models (whether that’s true or not). So our assumption here was that using location is more than a “nice to have,” it’s something users would expect to have.
So next up was connecting to the user’s current location to determine where to show on the map. Fortunately this was all quite easy to implement. The iOS map already had inbuilt support for showing the user’s location and heading on a map. It took another few lines of code to enable this, and centre the map onto their location.
func addSystemMapUserTrackingButton() {

   let userTrackingButton = MKUserTrackingButton(mapView: self.mapView)

   mapUserTrackingButtonContainer.addSubview(userTrackingButton!)

   mapView.showsUserLocation = true

}

func zoomToUserLocation() {

   if let userLocationCoords = mapView.userLocation.location?.coordinate {

      let userMapPoint = MKMapPoint(userLocationCoords)

      let userLocationWithinBounds = mapView.cameraBoundary?.mapRect.contains(userMapPoint)

      if  userLocationWithinBounds {

         let region = MKCoordinateRegion(center: userLocationCoords, span: MKCoordinateSpan.MID)

         mapView.setRegion(region, animated: true)

      }

   }

}
The next trick though was to manage the permissions to that location, and keep the UI in sync accordingly. Without permission explicitly granted to the App and implemented by the App, you don’t see the user location out of the box.
The case of the many cases
This took far longer to implement correctly than I expected. It’s where my decision to forego the guidance of TDD started to burn me (in my defence I followed patterns which I knew could easily be tested at a later stage). UI and state in Apps are natural bedfellows, and state for an App changes for many different reasons.
You can be online / offline / foreground / background / force quit and restarted. A user can change location permissions behind your back when your App isn’t in the foreground and aware. Location permissions may be granted only once, forever, or never.
I never learned the lesson, but implementing a state machine for wherever you have any number of states and UI to synchronise would save a lot of time and trouble.
It didn’t work out so badly, but this below is just the tip of a number of case statements needed to get everything working, and I really don’t like touching this code now because it feels too fragile. Hence adding Unit Tests is next on the list.
switch status {

   case .on:

     self.outlet?.show(UserTrackingEnableButtonUI.hidden)

     self.outlet?.showSystemMapUserTracking()

   case .off:

     self.outlet?.show(UserTrackingEnableButtonUI.disabled)

   case .undefined:

     self.outlet?.show(UserTrackingEnableButtonUI.enabled)

   case .initialising:

      break

}
Palate Cleanser
Gerald created a nice little palate cleanser in his attempt at App development. He fired up Xcode to track an obscure crash only his iPhone was able to produce. This led to perhaps a bigger palate cleanser than he was hoping for, not only for him, but his entire computer that eventually led to an OS X update to Catalina. Note to those who’ve not tasted App development previously – it comes with a dizzying and opinionated list of dependencies, which extends all the way to particular brands of computer, phones, IDEs and OS versions.
Dessert
We finally reached a point where we could launch our App to the world. So far development had used CI/CD using Buddybuild, to automatically code signs and upload builds to App Store Connect, which then publishes it to a team using Apple’s own TestFlight. This let us test the App before it hit the stores.
Next step to shipping was submitting it to the App Store for review. It’s always a little nail biting. Was there something we’d not thought of that would lead our efforts to be wasted?
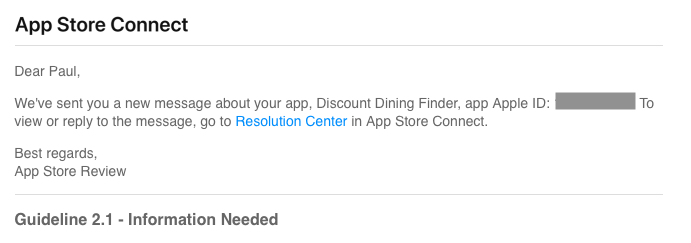
The App was submitted late on a Sunday evening. Lo and behold, by Monday morning there was a response ominously titled Guideline 2.1 Information Needed. Taking a gulp, I opened up the message and learned that all the App Review team needed was a video of the App working on a device.
Puzzled at first, it occured to me that the App is limited to use in the UK, which means that the App Review team in the U.S. somewhere are unable to see location working correctly given that it’s locked to the UK and could have seemed like a bug. A quick video was made and uploaded to the “Resolution Center.”
Cheese
Finally, after a tiny delay between courses, the App was approved and on Tuesday, 11th August 2020, released to the App Store. If you download it, you can find and enjoy a nice meal out at a local eatery.
A massive thanks to Gerald Benischke for coming up with the idea, sharing it, and doing most of the hard work already. The App code is all open source and over on GitHub – your contributions are welcomed.
ENJOY!
You may also like
Blog
Anyone Can Usability Test, Part 3: Making the Most of Your Findings
Blog
Rigorous development practices
Blog
Do we need roles in a cross functional team?
Get in touch
Solving a complex business problem? You need experts by your side.
All business models have their pros and cons. But, when you consider the type of problems we help our clients to solve at Equal Experts, it’s worth thinking about the level of experience and the best consultancy approach to solve them.
If you’d like to find out more about working with us – get in touch. We’d love to hear from you.